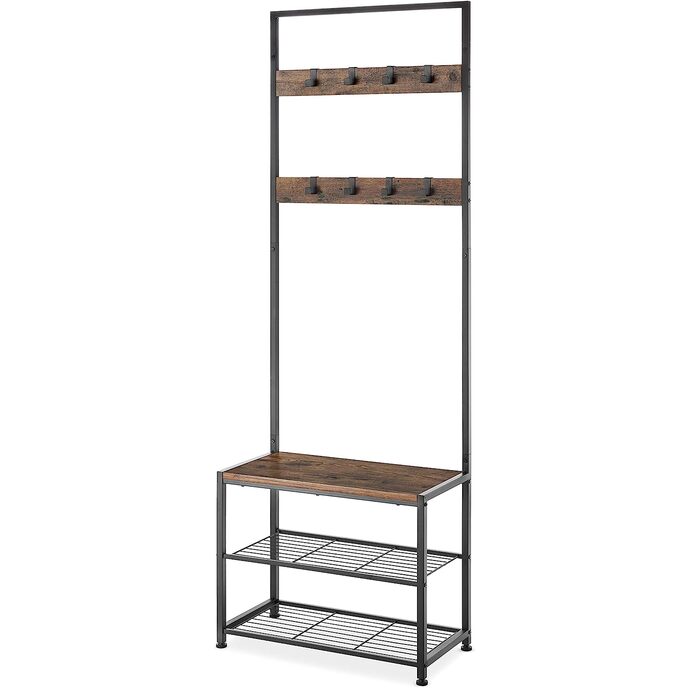
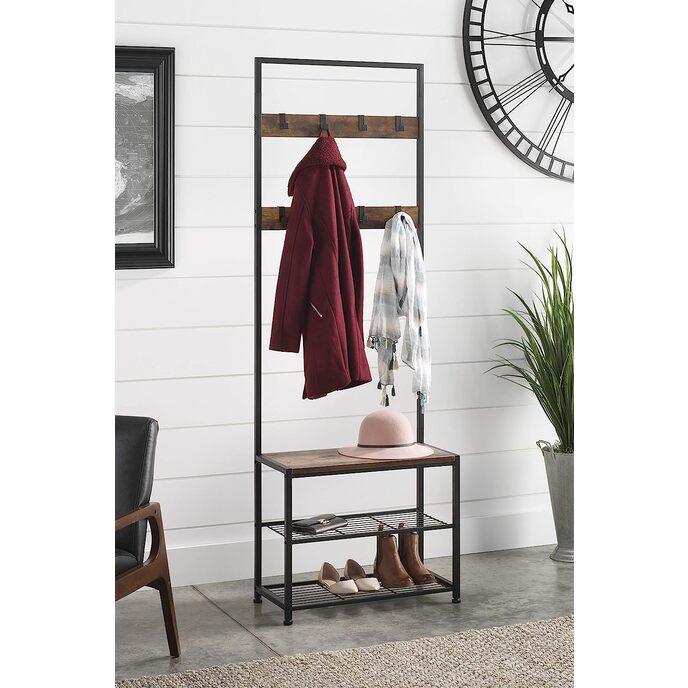
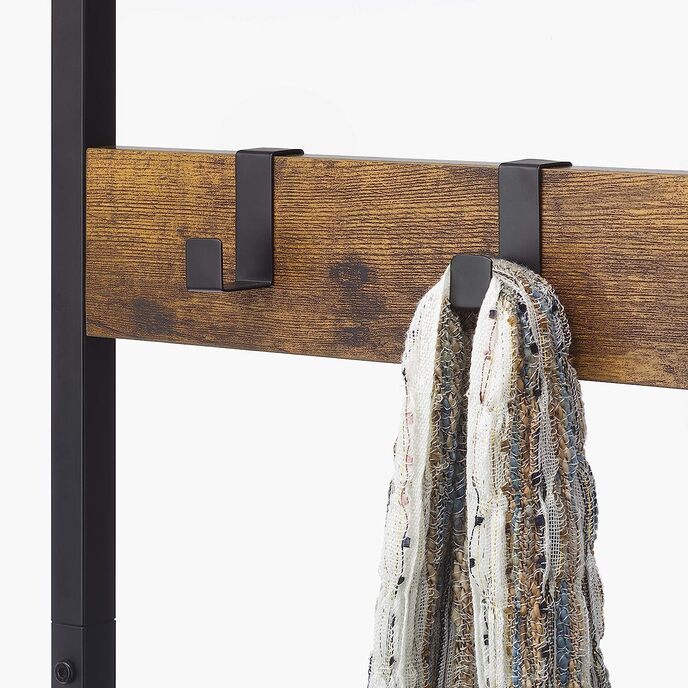
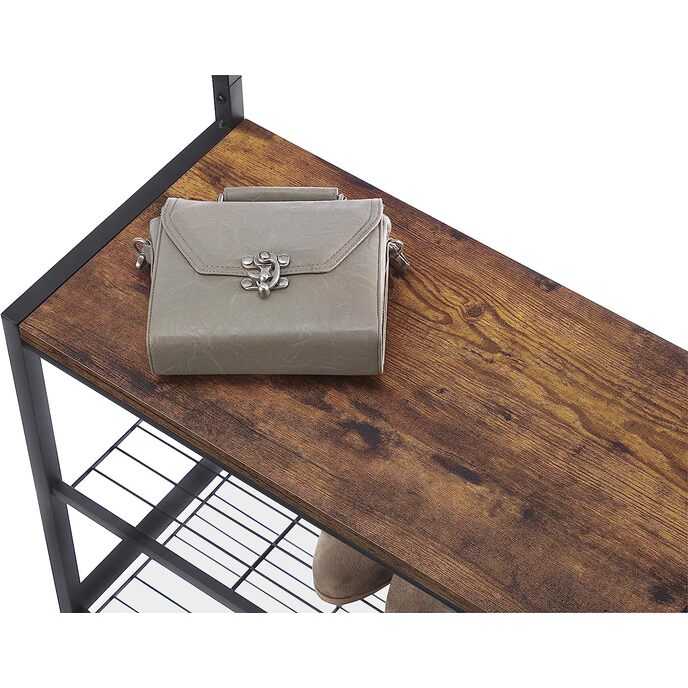
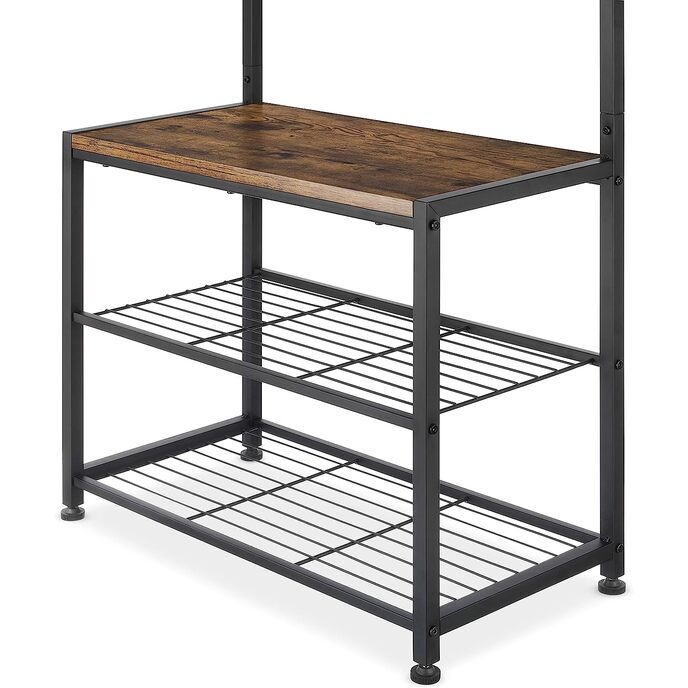
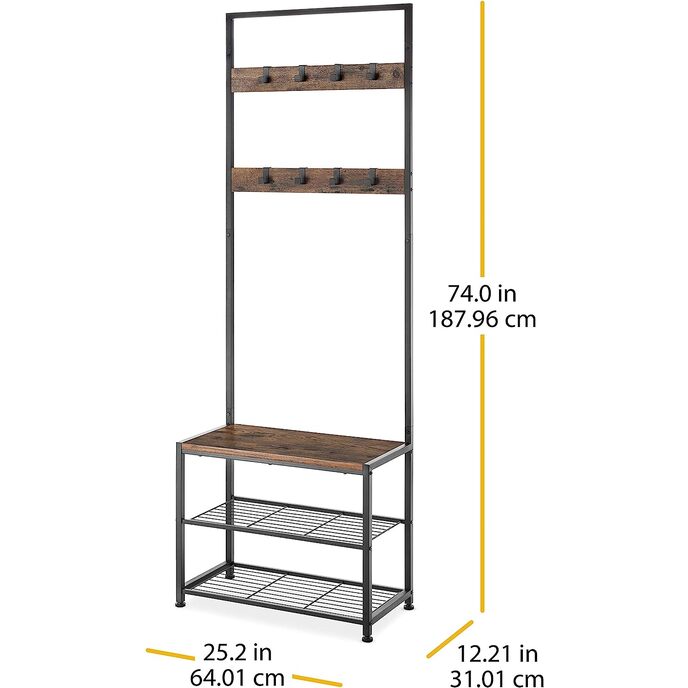
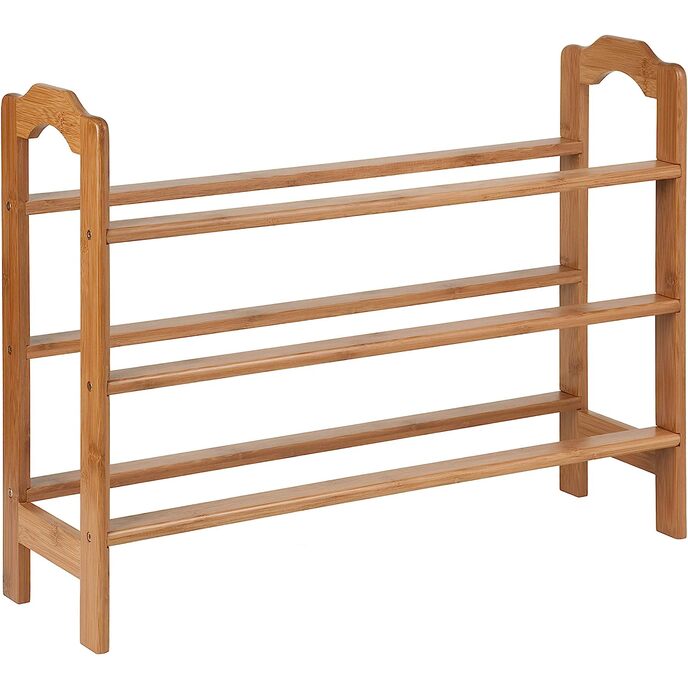
I am so happy I bought this product. One of the reasons I chose this entry way piece was because I had such good fortune with two Amazon kitchen cart purchases by Whitmor. This third purchase has solidified my trust in their products. It was an easy assembly (easier if I had been more mindful of the process - see below.) The end result looks great and works well for me. I even added some baskets have it align more with my needs and expand my decor theme. My two disappointments: (1) the panels are not real solid wood (like the kitchen carts) rather a really high quality veneer product. Unless I'm looking at it from 6 inches away, I can't tell (I'm just a purist.) (2) the little hooks look super cool, except each has a small hole on top that I think is not visually appealing. Again, from a distance, I can't see them. They do provide you with hardware to attach to wall, yet not allowed in my rental unit, and since I don't have children about, it seemed a good compromise to simply raise the front castors higher than the rear ones, so it slants in towards the wall. I gave the sturdiness factor 4 stars, because it does have a bit of a wobble up top, and I think it would have been unsafe without the wall attachment, however I eliminated this problem by my adjustments - as it rests against the wall. I will give you a head's-up on the directions. While they actually are super easy to follow, they have one error and one glitch.... So, be aware and save yourself some time and effort: 1.) Do not tighten your hex screws fully until each adjacent element has aligned & fitted. You may have a carpenter's awareness of this. If not, this concept most specifically applied for me when I went to add in the wood bench seat, wooden slats, and the top horizontal tube. That being said, not fully tightening any of them until the adjacent factors were adjoined, would have made my assembly journey easier. Just tighten 'er all up at the end so there's space and grace to add to each element in assembly (with the exception of assembling the bench board's horizontal slats.) 2.) The directions are numbered, yet they flow top to bottom, rather than from left to right. So, when you flip over to read page two, and get so excited you're getting near completion, don't do what I did and read step nine before step 6. While the instructions are clear & in English, as I usually read left to right, I forgot to look at the numbers in the steps when I flipped the page (the sections do not have defined boxes.) Luckily, I did not end up attaching it to the wall before going on to step 6 or I would have been ###.