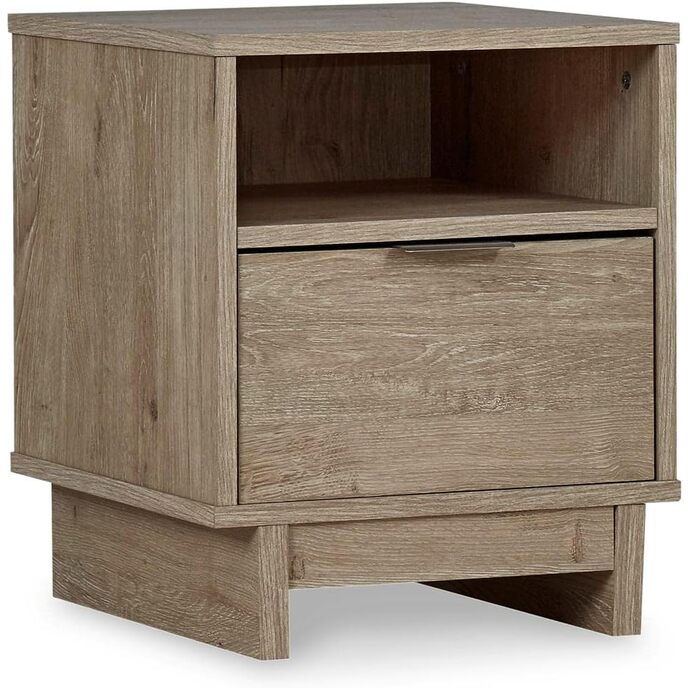
I needed a basic inexpensive nightstand for the guest bedroom, and the slide out shelf plus the very reasonable price for this one convinced me. I was expecting the 'usual' fiberboard furniture for this price, so I was stunned at the weight of the box when it arrived. What?! Why does a small nightstand weigh this much? This is mostly WOOD. Cool! First, the 'white' version is not white. This color is what most people consider Almond, with a brown/grey tint. It's not Ivory with a yellow tint, and it's not Off-White with a grey tint. It's Almond. Given all the comments about the color, I expected that and was fine with it. It's not hard to put together, but given that there's well over a dozen pieces, and 14 types of fasteners, I took my time assembling (an hour and a half). And STILL managed to make mistakes. I put the back panel screw side facing the front, instead outwards facing the wall. It's intuitive to put the screws on the INSIDE of furniture and not facing OUT, and judging by the comments about screw covers, others did the same thing. Maybe this caused the wobble I ended up with, but I'm not taking it all apart and rebuilding it again immediately. I had to shim the front left leg with a 1/2" piece of cardboard for the nightstand to sit level. Not as attractive as it could have been, and that's why the missing star. Everything was tightened, I missed no holes, and it's very solid, so the wobble is either poor hole drilling or my putting the back panel on backwards, right now, I don't know. But the fact that from other reviews, I'm not the only one who made the mistake, the directions are simply not clear enough about this. One simple sentence that says 'back screw holes should face outward' would have solved this for everyone. This is definitely a quality piece of furniture when done. I would buy it again in a heartbeat, despite the wobble, especially at the discounted price (probably because of the color). Also, it's very fun to put together, like a puzzle. There are a few areas that require some strength (screwing in the first set of screws using a screwdriver), another that requires some flexibility (reaching the screws in the far back when screwing the top piece in), and the bottom portions uses bolts that require an included small allen wrench... why not just use a screw that takes a phillips head? It took much longer to use the bolts because they are butted to the bottom and you had to keep resetting the allen wrench. Minor annoyance, but still worth mentioning. So Tips: 1. Lay out all 14 packages of hardware before you start, and make sure you know which is which and none are missing. I'm so glad I did this, as some look really similar and it's easy to use the wrong screws thinking they are all you have. 2. Figure out how the locking nuts work, and do not exert a lot of pressure getting them in. I did not have one fully seated correctly on the very first piece, and forcing it split the right rear top panel a hair. It is not visible, but could have been avoided if I had understood how they properly worked before doing it. If I had to do it again, I'd practice using the locking nuts on one piece before moving forward with assembly. I HAVE worked with locking nuts before, but forgot because it's been a while. 3. When putting on the back pieces, make sure the screw holes face OUTWARD. It IS clear in the diagram, but most people want a smooth outside finish, so either figure it doesn't matter, or think the diagram is drawn to be 'see through', so it's hard to tell. Again, this may account for my slight wobble. 4. On the bottom piece, I put the dowels in on the wrong side, they go on the smooth side. My husband had to pull the dowels out again with pliers, because I couldn't get them back out. So on the very bottom, put the dowels in on the smooth side to begin with. That's basically it. It wasn't hard, just a bit tricky, and despite how slowly and carefully I assembled, I still made mistakes. Other than the wobbling leg, it's a really solid and lovely table, exactly the size I needed. Hope this helps!