LG EAU61865301 Oryginalny silnik wentylatora konwekcyjnego OEM do serii LG/kuchenek/piekarników

Brand:LG

3.4/5

530.83

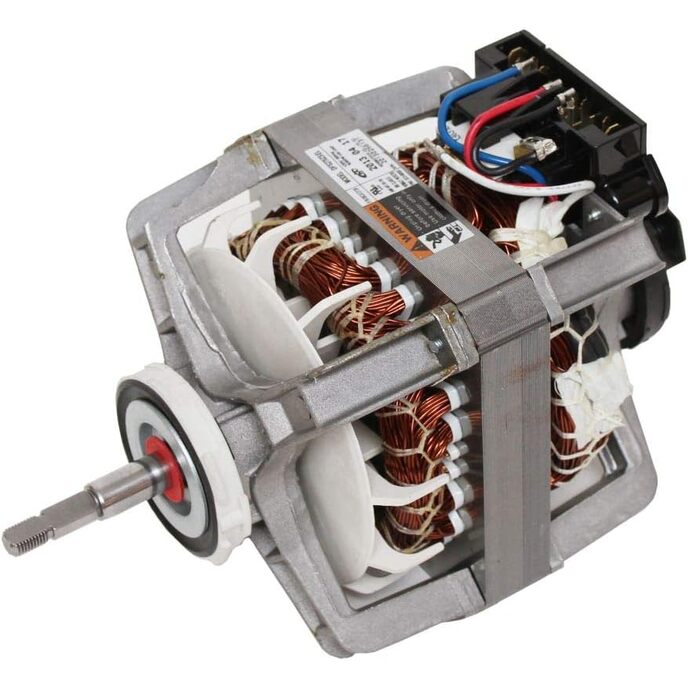
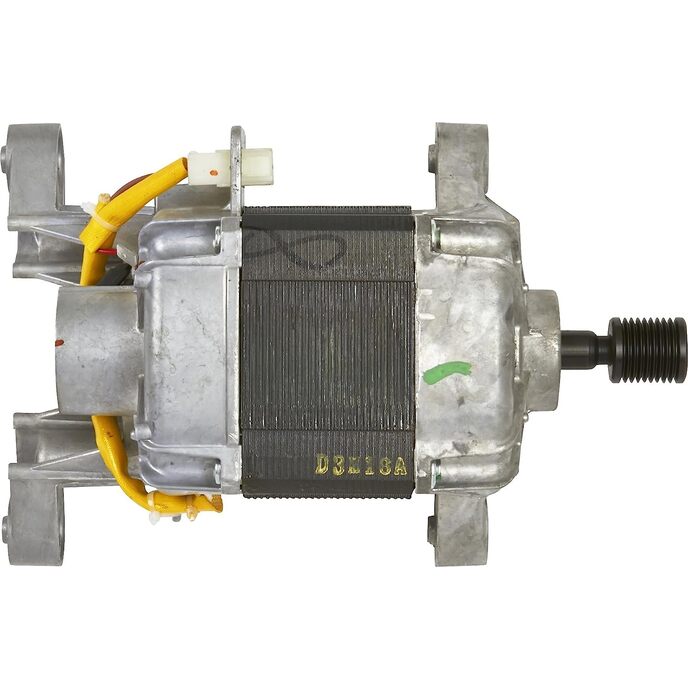
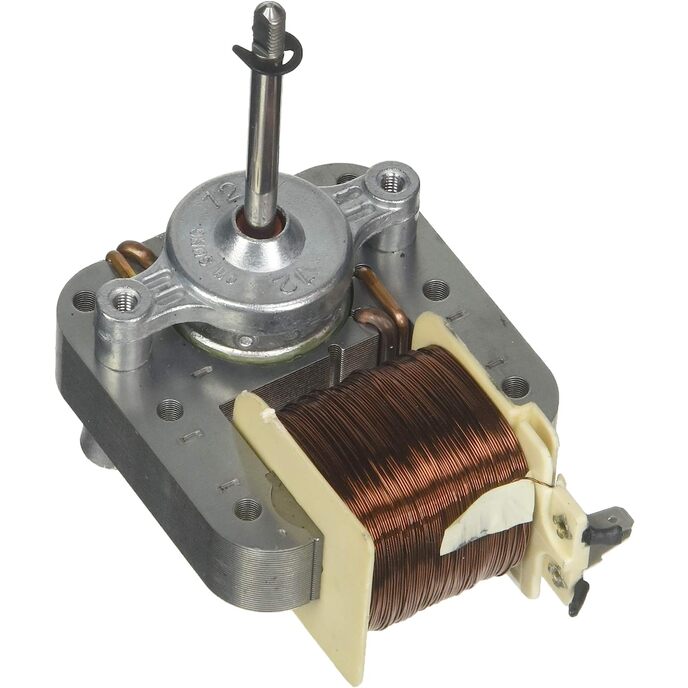
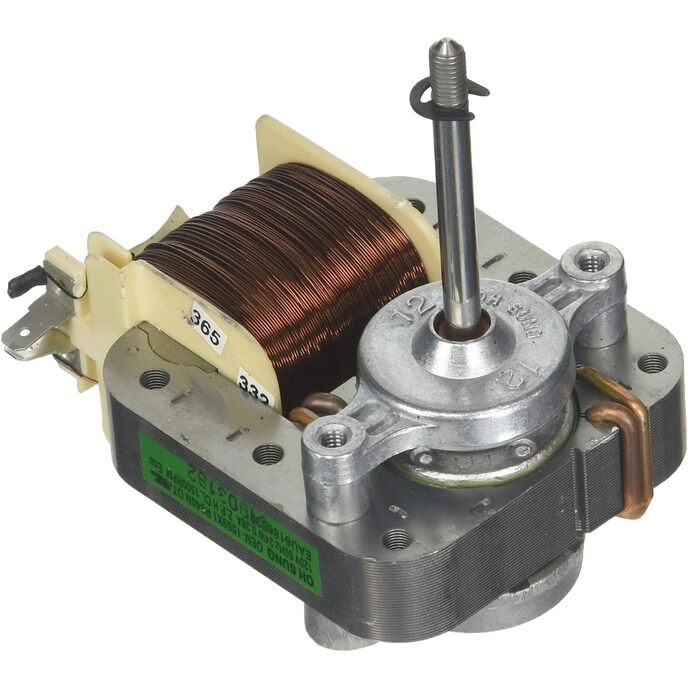
Ten wysokiej jakości silnik wentylatora konwekcyjnego LG OEM EAU61865301 do serii / kuchenek / piekarników marki LG jest produkowany zgodnie z dokładnymi specyfikacjami z trwałych materiałów. Silnik wentylatora konwekcyjnego obraca łopatki wentylatora, aby cyrkulować gorące powietrze w piekarniku w celu równomiernego ogrzewania. Należy pamiętać, że przed wymianą silnika wentylatora konwekcyjnego należy odłączyć wszystkie media od kuchenki/kuchenki/piekarnika.

Brak dostępnych jednostek
Życie jest dobre, jeśli wybierasz oryginalne części fabryczne LG OEM do swoich urządzeń LG. Wysokiej jakości silnik wentylatora konwekcyjnego LG OEM EAU61865301 Range / Kuchenka / Piekarnik jest produkowany z najwyższej jakości materiałów zapewniających trwałość i dokładne dopasowanie. Podczas instalowania tej części należy postępować zgodnie z instrukcjami zawartymi w instrukcji obsługi. LG EAU61865301 Silnik wentylatora konwekcyjnego kuchenki/piekarnika ma przybliżone wymiary dł.: 2,5 x szer.: 3,5 x wys.: 4. Zamienny silnik wentylatora konwekcyjnego kuchenki/piekarnika marki LG obraca łopatki wentylatora, aby zapewnić równomierną cyrkulację gorącego powietrza w piekarniku ogrzewanie. Ten silnik wentylatora konwekcyjnego LG jest oryginalną częścią OEM (producent oryginalnego sprzętu), wyprodukowaną zgodnie z dokładnymi specyfikacjami.
Batteries Included? ‎No
Batteries Required? ‎No
Customer Reviews 4.3 4.3 out of 5 stars 105 ratings 4.3 out of 5 stars
Included Components ‎appliance-replacement-parts
Is Discontinued By Manufacturer ‎No
Item model number ‎EAU61865301
Item Package Quantity ‎1
Item Weight ‎1.03 pounds
Manufacturer ‎LG
Part Number ‎EAU61865301
Product Dimensions ‎3 x 3 x 4 inches

3.4

8 Review
5 Star
74
4 Star
9
3 Star
5
2 Star
3
1 Star
10

Napisz recenzję

Twój e-mail nie zostanie opublikowany. Wszystkie pola obowiązkowe są oznaczone symbolem*

Scritto da: David P.
A quiet convection oven after replacement
My convection oven is over 10 years old. I have removed and cleaned the shaft of the fan motor several times. A few months ago the fan started to make noise which increased over time. I removed the fan and cleaned the shaft. This time the fan did not work after re-installation. Bummer. I then ordered this replacement. The new fan motor is as quiet as new. The fan I removed had worn the bearings, hence the fan stopped working since the rotor was rubbing against the stator, and these fans have very little torque. My only frustration is the high mark-up of this style motor. For a normal bathroom ventilation fan, the price would be 1/3 or 1/4 of the price of this motor. I appreciate this motor has to withstand the very high heat of the self clean cycle of the oven. I do not know if this requirement adds to the cost of the bearings/motor or other components. I can say I should have purchased this motor a year or more earlier.
Scritto da: Ray
Great part
Easy to install
Scritto da: Jay
Prefect replacement
Only took an hour to replace prefect fit for my oven
Scritto da: Corey Smith
Easy install, works great.
Exactly what I needed. Had to research a while to determine if this was the correct part, and it was.
Scritto da: Ralfi220
Perfect
Easy replacement, found a YouTube guy to help with the diy and it’s perfect.
Scritto da: Eric J.
Exact Replacement
This convection fan motor is an exact replacement for my LRE 3083ST range. From a difficulty stand point using a scale of 1 to 10 with 10 being difficult this is a 3. There is a YT video that shows the replacement in detail. Just remember when removing the fan inside of the oven that the nut holding the fan on is a left hand thread. The fan motor works perfectly and shipping was prompt.
Scritto da: stevenik
Easy install
Came on time. Looks OEM. This was an easy install for us. We unplugged the oven, popped it open and removed the racks. At the back is the fan bezel cover thingie held on by 4 screws. We removed it. Then removed the nut on the end of the fan. Pulled the C clip from fan shaft. We then hopped to the back. Removed the 5 screws holding the large middle panel. I think there were two screws on the smaller upper left panel. We removed that to help remove the larger middle panel. The fan was now exposed. Pulled the screws off. Swapped the motor and then did everything in reverse. Was good to go.
Scritto da: LT
Exactly as advertised!
Took about 30 minutes from pulling the oven away from the wall to placing it back; including the time took to clean the area behind it.

Produkty powiązane

Odkryj naszą międzynarodową sieć

Wysyłamy do 28 krajów, ponad 200 000 produktów. Bądź na bieżąco, zapisz się do newslettera.

Array